 Fernbrook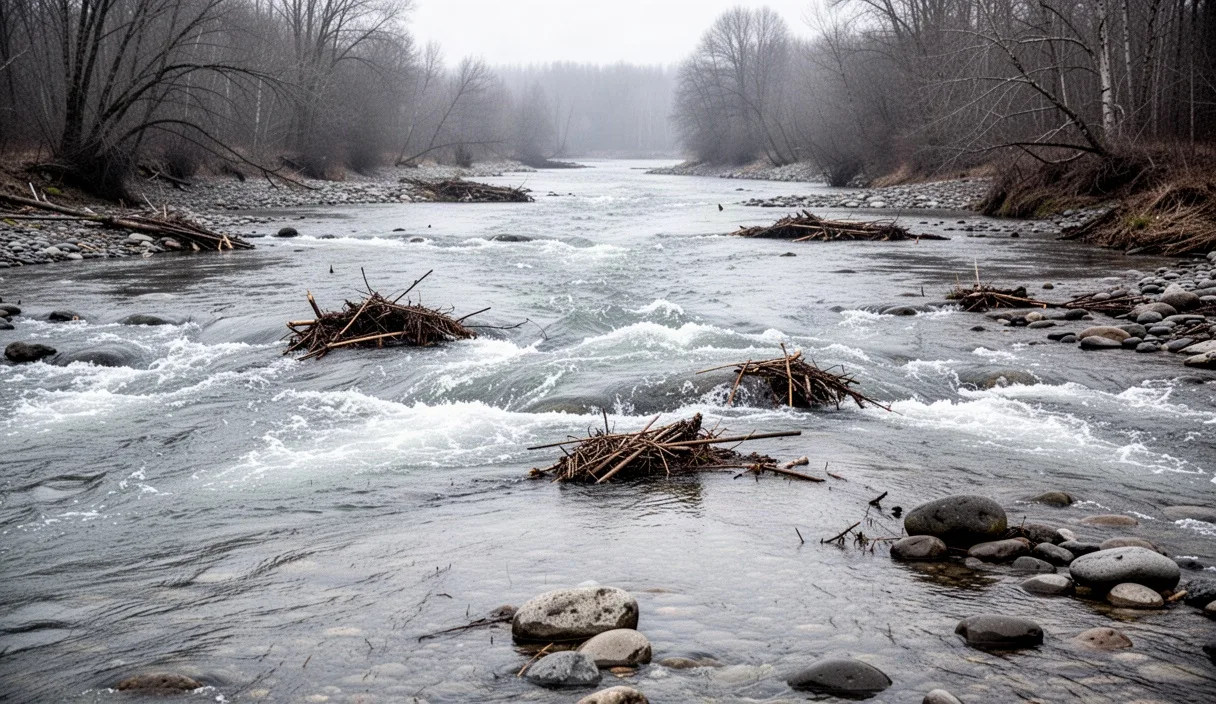

Every hiking season produces a small crop of avoidable accidents involving swollen creeks and rivers, and nearly all of them share the same origin story: a walker looked at the water in front of them, decided it looked manageable, and stepped in without asking what had happened upstream in the preceding day or two. Judging whether a crossing is safe after heavy rain is less about bravado and more about reading a set of signals correctly, in the right order, before committing a foot to the current.
This piece works through those signals: why rainfall far from your location matters more than the drizzle overhead, how to read water color and debris, how to test depth and current properly, how to pick a crossing point, how a group should move together, and when the only sensible decision is to turn back and wait. None of this replaces local knowledge or a park ranger's advice, but it gives you a working method for the moment you're standing on a bank wondering what to do next.
Why Rainfall Upstream Matters More Than Local Weather
A river's behavior at your crossing point is largely a record of what fell on its catchment area hours or days earlier, not what's happening in the sky above you right now. Water from a storm cell 30 kilometers upstream can take anywhere from two to twelve hours to reach a lower crossing, depending on gradient, soil saturation, and catchment size. This means a clear morning at your location can be deceptive if a front moved through the headwaters overnight.
Steep, narrow catchments concentrate runoff fast, sometimes producing a rise of half a meter in under an hour. Broader, flatter catchments spread the same rainfall over a longer period, so the river rises more gradually but stays elevated for longer, sometimes several days. Knowing which type of catchment you're dealing with changes how much weight you give to a forecast versus what you're actually observing at the bank.
Before setting out, check a regional rainfall map or a river gauge reading if one is available for the drainage you'll be crossing. Many countries publish real-time or near-real-time stream gauge data online, and even a rough number, showing whether a river is at, above, or well above its seasonal median, is more useful than guessing from the color of the sky. If no gauge data exists, ask locally: farmers, rangers, and lodge staff often have a working sense of how a particular river responds to rain.
A rule worth carrying in your head: if there has been sustained or heavy rain anywhere in the catchment within the past 24 to 48 hours, treat the river as still rising or still elevated, even if it looks calm where you stand. Waiting a day, when possible, is the cheapest insurance available.
Reading Water Color and Debris for Flow Speed
Color tells you what the river has been doing recently. Clear water generally means the flow has been steady for some time and isn't actively eroding fresh soil upstream. Brown or muddy water indicates active erosion, meaning the river is likely still rising or has risen very recently, since sediment settles out of slower-moving water within hours. A river that was clear yesterday and is chocolate-colored today is one that changed state overnight and should be treated with more caution than its current depth alone would suggest.
Debris is the second data point, and it's often more reliable than color because it's harder to misjudge. Watch the surface for a few minutes rather than glancing once.
- Floating leaves and small twigs: normal in almost any flowing water, not a warning sign on their own.
- Branches, logs, or fence posts: a strong indicator the river is carrying material it wouldn't normally move, usually meaning a recent rise upstream.
- Foam or aerated, cloudy-white water: suggests turbulence and higher velocity than the visual gradient might imply.
- Consistent line of debris along the bank above the current water level: shows the river has already been higher recently and may drop back, or may rise again if rain continues.
Speed can be roughly estimated by timing how long it takes a floating object, a leaf or small stick tossed in, to travel a measured distance along the bank, say 10 meters. Anything under about 8 seconds for that distance suggests a flow speed above 1.2 meters per second, which is enough to unbalance an adult carrying a pack. This isn't a laboratory measurement, but it's a far better basis for a decision than an eyeball guess from the bank.
Testing Depth and Current Before Committing
Depth and current interact, and neither should be judged from the bank alone. A river that's only knee-deep can still be dangerous if the current is fast enough to sweep a leg sideways with each step, and a slow-moving river can be dangerous simply by being deep enough to float a pack and pull a walker off their feet.
A trekking pole or a sturdy stick, used as a probe, is the simplest tool for testing depth incrementally rather than committing body weight to an unknown riverbed. Push it into the water ahead of each step, feeling for sudden drop-offs, submerged rocks, or soft silt that could trap a boot. Move it in an arc rather than straight down, since riverbeds are rarely flat and a drop-off half a meter to one side can be very different from directly ahead.
A widely used rough guideline, often taught in wilderness first aid and search-and-rescue courses, is that water above mid-thigh combined with a current strong enough to push against the legs is the point at which the risk of being swept off your feet rises sharply for most adults. This isn't a fixed threshold, since body weight, pack load, and footing all change the equation, but it's a useful mental marker: if the water is at or above mid-thigh and moving with any real force, that's a signal to look for a different crossing point rather than push forward.
Some walkers use the "stick test" for current strength: hold a stick or pole horizontally in the water at knee height and feel how much it wants to be pushed downstream. If it takes noticeable two-handed effort to hold steady, the current is likely too strong for a safe crossing at that spot.
Choosing a Crossing Point on the Bank
Not all points on a river are equally dangerous, and spending five or ten minutes walking the bank before committing to a spot is rarely wasted time. The instinct to cross at the first accessible point, often where the trail happens to meet the water, ignores the fact that trails were frequently cut for foot traffic convenience, not hydrological safety.
Wider sections of river are usually shallower and slower than narrow sections, because the same volume of water spread across a greater width moves with less force per square meter. A narrow gorge-like squeeze, even if it looks crossable at a glance, often concentrates flow into a fast, deep channel. Braided sections, where the river splits into multiple smaller channels around gravel bars, can also be safer, since crossing several shallow channels in sequence, resting on gravel bars between them, is generally less risky than crossing one deep channel in a single push.
| Feature | Generally Safer | Generally Riskier |
|---|---|---|
| Channel width | Wide, braided sections | Narrow, single-channel squeezes |
| Bank angle | Gentle slope on both sides | Steep or undercut banks |
| Bottom material | Visible gravel or sand | Slick bedrock or deep silt |
| Downstream hazards | Clear runout, no rapids or strainers | Rapids, log jams, or a drop nearby |
Always check what lies immediately downstream of the point you're considering. If a slip would carry you into a rapid, a fallen tree acting as a strainer, or a drop, that crossing point should be rejected regardless of how manageable the water looks directly in front of you. A calm-looking crossing 20 meters above a log jam is a very different proposition from the same water with a long, clear gravel run below it.
Group Crossing Techniques for Added Stability
Crossing as a group changes the physics of the problem, but only if the technique is right. A poorly organized group crossing can be more dangerous than a single competent person crossing alone, since a fall can pull others off balance too.
The most commonly taught method is the mutual support or "huddle" technique: two or three people face each other or link arms/shoulders in a tight cluster, facing upstream, and move sideways together in small shuffling steps, keeping at least two points of contact with the riverbed at all times as a group. This works because the combined mass and multiple points of contact resist the current far better than any individual could manage alone.
For larger groups, a line formation facing upstream, with each person gripping the shoulder or pack strap of the person ahead, can work on moderate currents, but it requires the strongest, most experienced person at the front breaking the current and the group moving in unison rather than at individual paces. A separate rope-based technique, where a fixed line is anchored on both banks and walkers clip in or hold on while crossing one at a time, is safer in fast water but requires someone experienced in rope work to set it up correctly; this is a case where, if nobody in the group has that training, it's worth consulting a guide or outdoor skills instructor before attempting it rather than improvising.
Packs should generally be worn with the waist belt and sternum strap loosened or undone before any crossing above ankle depth, so the pack can be shed quickly if a fall happens. A pack that can't be removed in a few seconds becomes a serious liability if someone goes under.
Signs You Should Wait Instead of Cross
Turning back is rarely the outcome anyone planned for on a hike, but it's frequently the correct one, and experienced trip leaders treat it as a routine decision rather than a failure. A handful of signs should prompt an automatic pause rather than a debate.
- The water is visibly rising while you watch, marked by advancing wet sand or a shifting foam line at the edge.
- The river is muddy brown when it's normally clear, indicating a recent or ongoing rise upstream.
- Depth at the intended crossing exceeds mid-thigh on the shortest member of the group, combined with any perceptible current push.
- Rain is still falling in the catchment above you, or a forecast shows more rain arriving within the next several hours.
- There's no clear, hazard-free runout downstream of the crossing point.
If two or more of these are present, the sensible move is to wait, often just a matter of hours for a fast-responding creek, or find an alternative route, such as a bridge, a longer detour to a narrower headwater crossing, or simply camping on the near bank overnight. Rivers that rise fast after rain also tend to drop fast once rain stops, often returning to a crossable level within 12 to 24 hours for smaller catchments. Checking a gauge reading, if available, before re-attempting is far more reliable than judging by eye a second time.
Common Mistakes
The most frequent mistake is anchoring a decision to how the river looked an hour or a day earlier rather than reassessing it fresh each time, since conditions upstream can change faster than conditions at the crossing point itself suggest. A close second is crossing facing downstream or sideways instead of angled slightly upstream, which reduces the ability to brace against the current and see approaching debris. Removing boots to keep them dry is another common error: bare feet on a rocky, uneven riverbed are far more likely to slip or suffer an injury than feet in secured footwear, and the marginal dryness gained isn't worth the tradeoff. Finally, groups sometimes let the fastest or most confident member cross first and report back, when it's generally safer to send the most experienced person first specifically to identify hazards for those following, while keeping the group together rather than spread across the crossing at different times.
Practical Next Steps
Before your next trip through terrain with river crossings, look up whether the relevant catchment has a public stream gauge or rainfall monitoring station, and note its baseline readings so you have something to compare against on the day. Pack a lightweight probe pole if you don't already carry trekking poles, and build the habit of spending a few minutes walking the bank in both directions before choosing a crossing point rather than defaulting to where the trail meets the water. If you're leading a group with mixed experience levels, consider a short practice session in calm, shallow water beforehand so the mutual-support technique isn't being learned for the first time in a genuinely difficult crossing. And where a route is known for seasonal flooding or fast-responding creeks, it's worth contacting a local ranger station or guiding service ahead of the trip for current conditions, since they'll often have information no map or gauge can provide.